DIY – Baby / Toddler Valentine´s Day Basket…

valentine´s day, baby gift, valentine´s day basket, peppa pig, baby snacks, heart basket, love book, diy, Valentine´s day DIY basket

valentine´s day, baby gift, valentine´s day basket, peppa pig, baby snacks, heart basket, love book, diy, Valentine´s day DIY basket

valentine´s day, baby gift, valentine´s day basket, peppa pig, baby snacks, heart basket, love book, diy, Valentine´s day DIY basket

valentine´s day, baby gift, valentine´s day basket, peppa pig, baby snacks, heart basket, love book, diy, Valentine´s day DIY basket

valentine´s day, baby gift, valentine´s day basket, peppa pig, baby snacks, heart basket, love book, diy, Valentine´s day DIY basket

valentine´s day, baby gift, valentine´s day basket, peppa pig, baby snacks, heart basket, love book, diy, Valentine´s day DIY basket

valentine´s day, baby gift, valentine´s day basket, peppa pig, baby snacks, heart basket, love book, diy, Valentine´s day DIY basket

….

Happy Wednesday, 

(post contains affiliate links/Werbung/Markennennung/Beitrag enthält Affiliate Links-not sponsored)

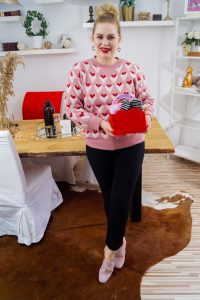
today marks my last Valentine´s Day post for this year but also the best one too (at least for me). To be honest this was one of the things I got excited when I was pregnant with Emilia. I love to gift little holiday themed things / baskets (not only to my child) to other people in my life but getting baby items is definitely on the cuter side. The little basket is not only for playing / snacking but also a teachable moment. I know she is too small to fully understand what´s going on this year but I also know how happy Emilia gets when I show her a new toy or book she gets to keep so this will definitely warm my mama heart.

Anyways if you are not interested in making the basket by yourself you can skip the next paragraph where I am sharing what you will need to get crafty asap.

What you will need

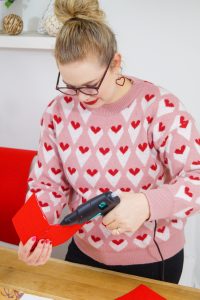
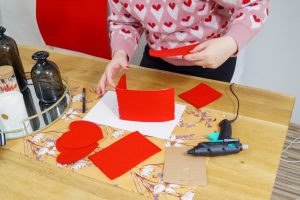
Congratulations! You are trying to accomplish this by yourself rather than buying. I have to admit I thought it would be super easy but there are definitely some tricky parts. So let´s start with the felt. I got it from an etsy shop. Make sure to get a thickness of 4 or 5 mm otherwise it will be to thin and won´t hold up. You will need a very sharp scissor to cut it. I had to go over to my parents house cause obviously all of ours are too blunt. 

The meassurments should be as you need it. I just put down the tallest object which was the book in our case and went with the width plus some additional space of a few mm. You will need three pieces of the bigger parts (front, back and bottom piece) and two pieces of the small parts (the two side pieces). If you want to you can also make a handle but I didn´t do one. Another cute feature I added are the hearts on the back and the front. I got the template from Pinterest.

After you cut out all your pieces it is time to heat up your glue gun. The glue dries fast on the felt so you should work quick. Another tip from my side – don´t use too much glue. It dries white and you will see it on the sides if it leaks. The hearts are higher than the sides but that was intended to add some dimension.

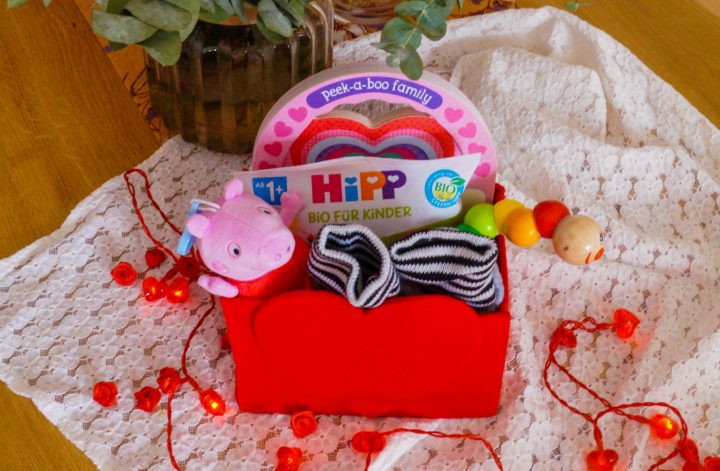
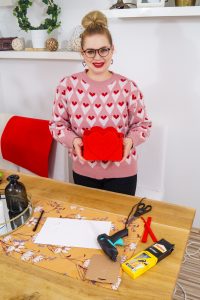
Overall I am very pleased with the look of my little Valentine´s Day basket for Emilia. But to be honest I am sure she is going to rip it apart in no time cause that is what she love to do at the moment. Nevertheless I gave my best to give her a great first Valentine´s Day present.

What to put in the basket

valentine´s day, baby gift, valentine´s day basket, peppa pig, baby snacks, heart basket, love book, diy, Valentine´s day DIY basket

valentine´s day, baby gift, valentine´s day basket, peppa pig, baby snacks, heart basket, love book, diy, Valentine´s day DIY basket

valentine´s day, baby gift, valentine´s day basket, peppa pig, baby snacks, heart basket, love book, diy, Valentine´s day DIY basket

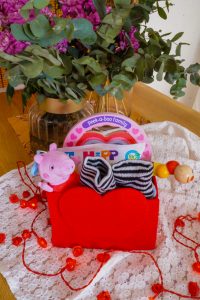
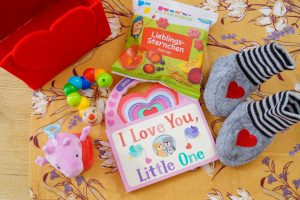
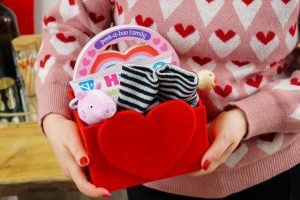
This is the second fun part (maybe a little too much fun for me) – filling the basket. I went with snacks, a Valentine´s Day themed pekaboo book, cute little house shoes with an embroidered heart, a Peppa Pig stuffed animal and a little wooden toy. 

I can´t wait to give it to her and see how happy she will be.

Are you planning anything for your kids. Heart shaped pancakes or doughnuts would be so cool too but she isn´t eating any of that yet.

See you tomorrow guys.

Weiterlesen

DIY – Mommy and Me Tie-Dye Shirts…

tie-dye, mommy and me, diy project, fashionblogger, tie-dye baby body, tie-dye womans shirt

tie-dye, mommy and me, diy project, fashionblogger, tie-dye baby body, tie-dye womans shirt

tie-dye, mommy and me, diy project, fashionblogger, tie-dye baby body, tie-dye womans shirt

tie-dye, mommy and me, diy project, fashionblogger, tie-dye baby body, tie-dye womans shirt

tie-dye, mommy and me, diy project, fashionblogger, tie-dye baby body, tie-dye womans shirt

tie-dye, mommy and me, diy project, fashionblogger, tie-dye baby body, tie-dye womans shirt

….

With all the quarantine restrictions due to Covid 19 we have been facing for the last few months on a daily basis lots of people have gotten super creative in terms of renovating their homes or exploring their inner Martha Stewart and have been cooking and baking ever since. I for myself had a baby which was also time consuming so my first DIY project took me awhile.

But today I am finally sharing my DIY tie-dye shirt on my little corner on the internet. After looking at so many shirts I could never find a piece I loved and if I did it mostly was sold out or super expensive so after watching a ton of YouTube video I decided to make my own – Mommy and Me version. 

How to Tie-Dye your own shirts?

tie-dye, mommy and me, diy project, fashionblogger, tie-dye baby body, tie-dye womans shirt

tie-dye, mommy and me, diy project, fashionblogger, tie-dye baby body, tie-dye womans shirt

tie-dye, mommy and me, diy project, fashionblogger, tie-dye baby body, tie-dye womans shirt

tie-dye, mommy and me, diy project, fashionblogger, tie-dye baby body, tie-dye womans shirt

tie-dye, mommy and me, diy project, fashionblogger, tie-dye baby body, tie-dye womans shirt

tie-dye, mommy and me, diy project, fashionblogger, tie-dye baby body, tie-dye womans shirt

tie-dye, mommy and me, diy project, fashionblogger, tie-dye baby body, tie-dye womans shirt

So I ordered a tie-dye kit off of amazon and thought by myself how hard could it be, I mean thousands of people already done it. I was quite confident to start on the pieces (I got a pair of longsleeves and t-shirts from H&M as they also carry baby clothing) but felt a little overwhelmed after mixing the paint but I went on how I wanted to die our clothes and to be honest I think they turned out great for a first time. 

The method I used for our shirts is called the crinkle method and probably the easiest of all. You just crinkle your shirts together and fixate them with a rubber band (much easier with the baby bodies as they didn´t take up to much space but my shirts, even crinkled, where quite large so I managed to color, flip and put them into a ziplock bag without). Also I soaked the shirts with a vinegar water solution for about an hour upfront cause it said that the color is supposed to hold and look better after.

After letting the color set for about 4-6 hours you can rinse each shirt with cold water and wash afterwards. The color with get a little lighter but still looks beautiful. Let it air dry and you are good to go.

Some tips: 

– blue is the most pigmented color so I would recommend to wear gloves even to rinse it off as otherwise your hands will stay blue for some time

– plastic foil also works to keep it damp but a ziplock bag is the best

It was so much fun and I probably make another bunch with more difficult patterns cause I have so much color left. Some baby socks or/and a neckerchief for our dog would be great. 

As of now I am pretty impressed with how easy it has been and I for myself think I got great results. 

Weiterlesen